Installing multiple Steam client always
drove me crazy with PlayOnLinux, when you see the big picture (no pun
intended) you realize that you have over 100+ steam games and that
you need to create a new virtual for each, and it's not even rare.
Why one virtual drive for each game? There's something called
regression, sometimes games break in new WINE releases, so people
have to use the WINE version that works for that game.
Before we start:
- By configuring it this way you will have to create the shortcuts for each single steam game. This might sound “bad”, but it's really easy.
- We don't use the terminal as much in this guide, so rest at ease.
- Please read through the notes and comments I leave. Skipping the registry steps could make Steam unstable.
- (Optional) Users are required to have a very basic understanding of what is a WINEPREFIX, this helps a lot.
The guide may seem really long, but it isn't. Most of the time it's just me explaining stuff.
The Idea
The main idea or scope of this guide is to teach you how to have ONE steam installation and be able to manage multiple Steam Libraries in different drives.Side note
Symlinks (Symbolic Links) plays a big role in this guide. PlayOnLinux as of 4.2.3 and older version has a bug that doesn't know how to handle symlinks. This is not important, WINE knows how to handle them just fine. If you create a drive_c symlink from a NFS mount, it will run the application just fine.
Benefits
- By having only one Steam installation you can manage/download your Steam games in one central point
- You will also save space from all the tedious redundant Steam installations done by PoL
- Your credentials are saved in the main Steam installation, meaning that re-using it will keep you logged in for as long as is takes.
- Settings are never forgotten, this is a plus if you want specific games to have overlay.
- Easy management and updates.
- If you are a GamersOnLinux user, the Steam game installations will be done in a slight different way. I will do a follow up after this guide on how to know what to do, however, there's a high possibility that you'll know how to do it at the end of this guide.
Drawbacks
- To make this work, you will have to create shortcuts manually in PoL folder for both Steam and games.
- Import registry for every new virtual drive.
- Not exactly a drawback, using the terminal is awesome but yea, you have to use the terminal to create the symlinks. I'm not going to do screenshot examples because everyone has different Desktop Environments.
If you notice, they drawbacks are really.... silly,
compared to what we will be gaining.
Wait a moment, if I have all Steam games in one
location, won't it mess up wine prefixes done by PlayOnLinux?
Not at all. Remember that
PoL is pretty much a wrapper around WINE. When you create a virtual
drive, you do it for the purpose of making that game work.
After you finish the guide, you will see the bigger picture.
So why do I need to create a shortcut of Steam in
every virtual drive?
Steam games requires
it to be running, if you are new to Steam don't let that take you by
surprise, a lot of windows gamers are used to it. When you create the
shortcut and launch it using that virtual drive, you are telling WINE
“launch Steam, using version 1.7.8”, once Steam is running,
within the same virtual drive you'll launch the Steam game you want.
In a nutshell, you run
Steam on the virtual drive (wine prefix), when you launch a steam
game within the same virtual drive, the game will recognize that
steam is running and steam will know that a steam game is launching.
Alright,
enough talk, let's get our hands dirty.
Side Note
I'm going to make
this guide as uniform as possible. I'll be taking decisions
for you, however, you can set up the folders HOWEVER you want.
Step 1) Choose
a main location for your Steam installation.
I chose mine to be
in /home/david/WINEApps/Steam
Open up your terminal and write:
mkdir ~/WINEApps
Step 2) Choose
a main location for your Steam Library. Remember, I said Steam
Library. I'm not going to explain what are Steam libraries, please
search the web.
I chose mine to be
in /media/david/Usagi/Library/Games, however to keep this guide
uniform. I will create it in your user directory.
mkdir ~/Library/Games
Step 3)
Side Note
For the sake of getting a fresh install of Steam (one last time – Dream Theater), let's install Steam. If you are following this guide, by now you should know how to do this. Experienced users can skip to step 4
Open your
PlayOnLinux, click Install

Click on Install a non-listed program

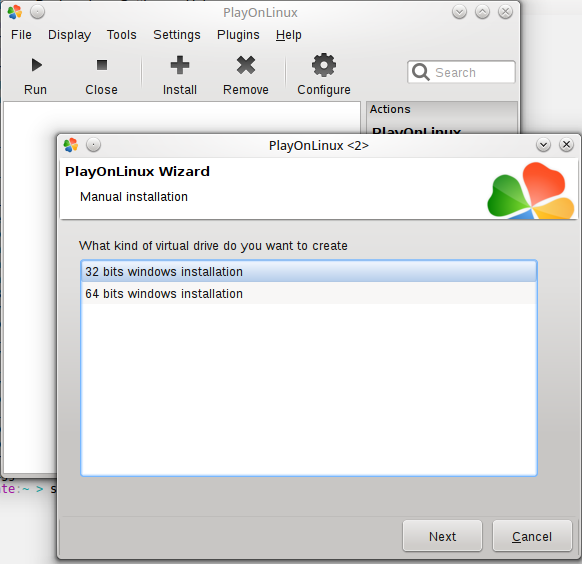
Create a virtual drive called Steam. (as shown in the screenshots)


Click on “Use
another version of WINE” choose any from 1.7.8 and up. I used a 32 bits installation.


Then choose the Steam installer you downloaded.


 |
| It will probably appear without these letters, but yea. close it. |
Let Steam finish installing then close it after the Steam login popup appears.
If PlayOnLinux window thinks it's still installing Steam after you closed it, just press cancel, no harm done.
Step 4)
Awesome, you got a
fresh Steam installation.
First, Downloadthis registry file. You can look at it, it just has basic Steam
registry. KEEP THIS FILE BECAUSE YOU WILL CONTINUE USING IT.
Side Note
In truth I don't know if the registry import is completely required. Do note that not choosing to import the registry could make Steam crash or become unstable.
Open your terminal
and type
cd ~/WINEApps
mv ~/.PlayOnLinux/wineprefix/Steam/drive_c/Program\ Files/Steam ./
Alright, we got
the Steam installation in our WINEApps folder if no error message
appeared. You can check by typing ls in the terminal, like this
ls
david@david-mate:~/WINEApps > ls
Steam
Side Note: Why not leave the Steam installation there?
Commodity, /home/david/WINEApps/Steam can be easily memorized and less error-prone than /home/david/.PlayOnLinux/wineprefix/Steam/drive_c/Program\ Files/Steam
After you are
done moving Steam, remove the virtual drive you created to
download it.
Step 5)
Let's create a new virtual drive!
Call it Steam4All (or whatever you want, just no spaces, and please remember the name you use, we'll keep using it)
(32 bit WINE,
1.7.8 or above)


When it asks you
to browse the file to install, press cancel.
Step 6)
Let's create a symbolic link now.
Side Note - IMPORTANT
For every virtual drive you create to run a Steam game, you have to create a symlink for each of them. In this case. We are going to do a symlink of our Steam folder in ~/WINEApps/Steam in the Steam4All virtual drive.
For example: If you want to run Skyrim, then create the virtual drive for skyrim THEN create the symlink of the steam folder.
Open your
terminal:
ln -s ~/WINEApps/Steam ~/.PlayOnLinux/wineprefix/Steam4All/drive_c/Program\
Files/Steam
Side Note – Complimenting my Skyrim comment –
THIS IS JUST AN EXAMPLE. If it was a Skyrim installation, after the virtual drive creation, supposing it's called Skyrim
ln -s ~/WINEApps/Steam ~/.PlayOnLinux/wineprefix/Skyrim/drive_c/Program\
Files/Steam
Step 7) Let's create the shortcut
manually
I'm going to get visual so you get
an idea of what I'm doing. Usually this is a PlayOnLinux shortcut:
Let's go to ~/.PlayOnLinux/shortcuts
folder here are some screenshots


We are going to create a new file
called “Steam4All” and paste this
#!/bin/bash
[ "$PLAYONLINUX" = "" ] && exit 0
source "$PLAYONLINUX/lib/sources"
# Always remember to change the WINEPREFIX path
export WINEPREFIX="/home/USERNAME/.PlayOnLinux//wineprefix/Steam4All"
export WINEDEBUG="-all"
# Important part
cd "/home/USERNAME/WINEApps/Steam"
POL_Wine Steam.exe "$@"
REMEMBER TO REPLACE USERNAME WITH
THE USER YOU ARE CURRENTLY USING.
Side Note
If you take a
look at PlayOnLinux picked it up instantly. DO NOT RUN IT YET

If you haven't downloaded the file, click here. (If you wanted you
could do Step 8 before 7, it doesn't matter, but never forget the
registry)
Press Configure in your POL.
Go to the Wine tab and press Registry Editor

Click on the Registry label in the menu bar.
Click on Import Registry, find the registry you downloaded and
load it. No messages will be given. Once you load it, close the
registry editor.


IMPORTANT NOTE
You don't have to write -no-dwrite anymore. I disabled dwrite in the registry you loaded. Hurrah? HURRAH
Step 9)
Friends, mates, aliens. We are done. Let's run this. If you really need to know what to do .... just click on Steam4All and run it.


Step 10)
Let's create a Steam Library.
Go to View->
Settings

Go to
Downloads


Click on Add
Steam Library


Add the path
we created, it should be in /home/USERNAME/Library/Games and you are
done.
This is it people, We finished configuring our main Steam
installation. You can add as many steam libraries you want.
COMPLEMENTARY
GUIDE – How to install games with this setup
Okay, I'm not going to walk you through a whole game installation
guide. I will however explain how to compliment our new steam setup
with your steam game installations. I'm going to install Skyrim.
Here's what I will do, if you need help on installing Skyrim, read
GamersOnLinux Skyrim Guide. However, you DON'T NEED TO install Steam.
Also, please remember to choose the right Steam Library.
With the new Steam installation, download Skyrim. (Please note that
this is an example)

Step 1) Once Skyrim finishes downloading go to PlayOnLinux and
create a virtual drive for Skyrim. I'm using WINE 1.7.10-CSMT.
Remember to use GamersOnLinux guide to know what libraries to
install for your virtual drive (e.g .NET Framework, dxfullsetup, etc)
Step 2) Once you create the virtual drive, we are going to
create two shortcuts (three if you are using SKSE)
Create these
shortcuts in ~/.PlayOnLinux/shorcuts
Create the
file and call it: Steam (for
Skyrim)
(the letters in italic is the filename)
#!/bin/bash
[ "$PLAYONLINUX" = "" ] && exit 0
source "$PLAYONLINUX/lib/sources"
# Always remember to change the WINEPREFIX path
export WINEPREFIX="/home/USERNAME/.PlayOnLinux//wineprefix/Skyrim"
export WINEDEBUG="-all"
# Important part
cd "/home/USERNAME/WINEApps/Steam"
POL_Wine Steam.exe "$@"
Create another file and call it Skyrim
 #!/bin/bash
[ "$PLAYONLINUX" = "" ] && exit 0
source "$PLAYONLINUX/lib/sources"
export WINEPREFIX="/home/USERNAME/.PlayOnLinux//wineprefix/Skyrim"
export WINEDEBUG="-all"
cd "/home/USERNAME/Library/Games/SteamApps/common/Skyrim"
POL_Wine Skyrim.exe "$@"
Create another file and call it Skyrim SKSE
#!/bin/bash
[ "$PLAYONLINUX" = "" ] && exit 0
source "$PLAYONLINUX/lib/sources"
export WINEPREFIX="/home/USERNAME/.PlayOnLinux//wineprefix/Skyrim"
export WINEDEBUG="-all"
cd "/home/USERNAME/Library/Games/SteamApps/common/Skyrim"
POL_Wine skse_loader.exe "$@"
That's all. Go to your PlayOnLinux and launch the game. :)
Side Note
This is a RINSE AND REPEAT process. Now whenever you create new
virtual drives, just change the path in WINEPREFIX and make sure the
change directory path is pointed to the game folder.
Later on I'll try to do a Borderlands 2 installation setup with this,
you'll see how easy it is.
Questions
Q: If I change WINE versions, will the files in my Steam folder be
affected?
A: No. That WINE version
will get updated, the registry will remain intact.
Q: How does Steam works when the physical files are not in
drive_c/Program Files?
A: WINE knows how to
distinguish a symlink, you could create a symlink of drive_c and
store all the files in Dropbox if you wanted. (not recommended, don't
get any weird ideas...)
Q: What happens if I launch the games in my main Steam virtual
drives?
A: If you don't prepare a
virtual drive for each game properly. The obvious scenario is that
the game won't run. The libraries are not installed, the game will
crash. It's important to always create a virtual drive for each game,
regardless if this Steam installation is being used for all of them.
Q: Can I organize
all my previous Steam game installations?
A: Yes, and please don't panic right away. Please read carefully.
Go to your previous installations through PlayOnLinux's Virtual
Drives
All Steam games are installed in Steam/SteamApps/common
You will see all games folder with
their proper name.
If you followed the guide, just drag and drop the folder to
/home/USERNAME/Library/Games/SteamApps/common
Open your Steam4All installation, the game won't be recognized on
the fly. Proceed to install the game, Steam will say “Discovering
Borderlands 2 files” then “Verifying files”. When it completes,
you are done. You have successfully ported the game.
Like this:


Like this:
Please ask in the forums if you have doubts.
No comments:
Post a Comment